Monday, 15 October 2012


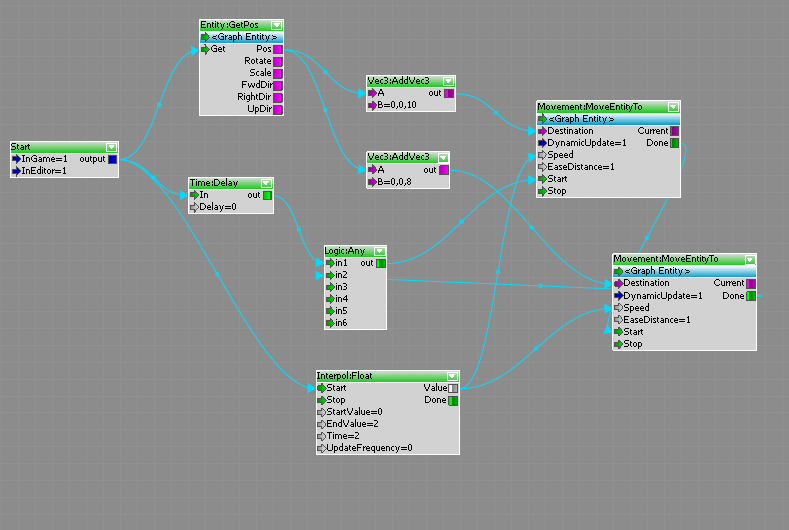
Screenshots of Flowgraphs
Since I took so long learning how to use the flowgraph editor in CryEngine I decided to take some screenshots as an example of the complexity of the movements. These Flowgraphs control the states and movements of the various entities and cameras in my model.


Tuesday, 2 October 2012
CryEngine Development

Learnt about voxel objects to construct a cave form beneath my model

A screenshot showing the placement of my spawn point above the cave mouth (Later shifted inside the cave)

The 'snowflake' entity had movements applied, rising out of the water inside the cave.


These entities move at different times, building tension for a collaborative effect

I also looked at constructing a wharf model in SketchUp for the character to stand on at the beginning of the segment, but abandoned it after deciding it would detract from the main model and the abstract nature of the space.

After learning more about tagpoints in CryEngine I shifted the movement to the tagpoint and linked the entity to this, so that I had more control over where a movement originated, for example so that the entity spins from the center rather than an automatically generated external pivot point.

I deleted my original model and instead reconstructed it from individual 'beams' made in SketchUp, so that each entity could move individually.

After piling up layers of 'beam' entities I created 96 tagpoints, one for each 'beam', and placed them at the middle point of each 'beam'. Grouping the tagpoints in fours made a group for each layer of the structure (a layer as seen in the image prior to this one), and I then expanded the group from the centre to set a location for each 'beam' to move towards as the structure disintegrates.

After ungrouping the tagpoints I put together the flowgraphs for each beam to move towards one tagpoint.

With the majority of the flowgraphs written I started to add details to my landscape, leaving the area around my model bare to preserve its importance within the space.

With the water temporarily removed the number of 'snowflake' entities is clearer. Also seen are the rocks I placed throughout the cave, working in conjunction with the rock texture applied to the cave voxel object.
100 word intention statement:
With my model now imported successfully I have confidence that I will be able to manipulate textures and animations effectively. My intention is to highlight the design principle that inspired this design; proportion and composition. The proportion of the 'snowflake' entities is a lot smaller than the main model, so I will begin by revealing these, then follow one as it raises out of the cave and through the 'tower'. There will be a contrast in the scale of the two which will hopefully make the 'tower' seem bigger and more impressive. Also, I plan to have the separate 'beams' forming the 'tower' all move apart, to demonstrate the collaborative composition.
Repeated Movement Flowgraph Guide

Okay I've put together a flowchart guide to show how I made my entities move back and forward repeatedly, with an ease so it isn't a jerky movement. I also included the part which make them spin.
Flowgraph Development
Just a few shots of how I developed my flowgraph.

I started with a simple thread which made the entity move in one direction

Next I managed to make the entity make another movement following the first- but there were still a lot of bugs.
After discovering the 'float' node I learnt how to construct an ease for the movement at the start so that the movement wasn't jerky.

This was my final flowgraph, making the entity move up, ease, move down, ease, then repeat an eased vertical movement continuously.
Wednesday, 19 September 2012
Screenshots for Interim Presentation

Looking at rotation, repetition and water

Different light qualities- night time and a light glow from the white sections
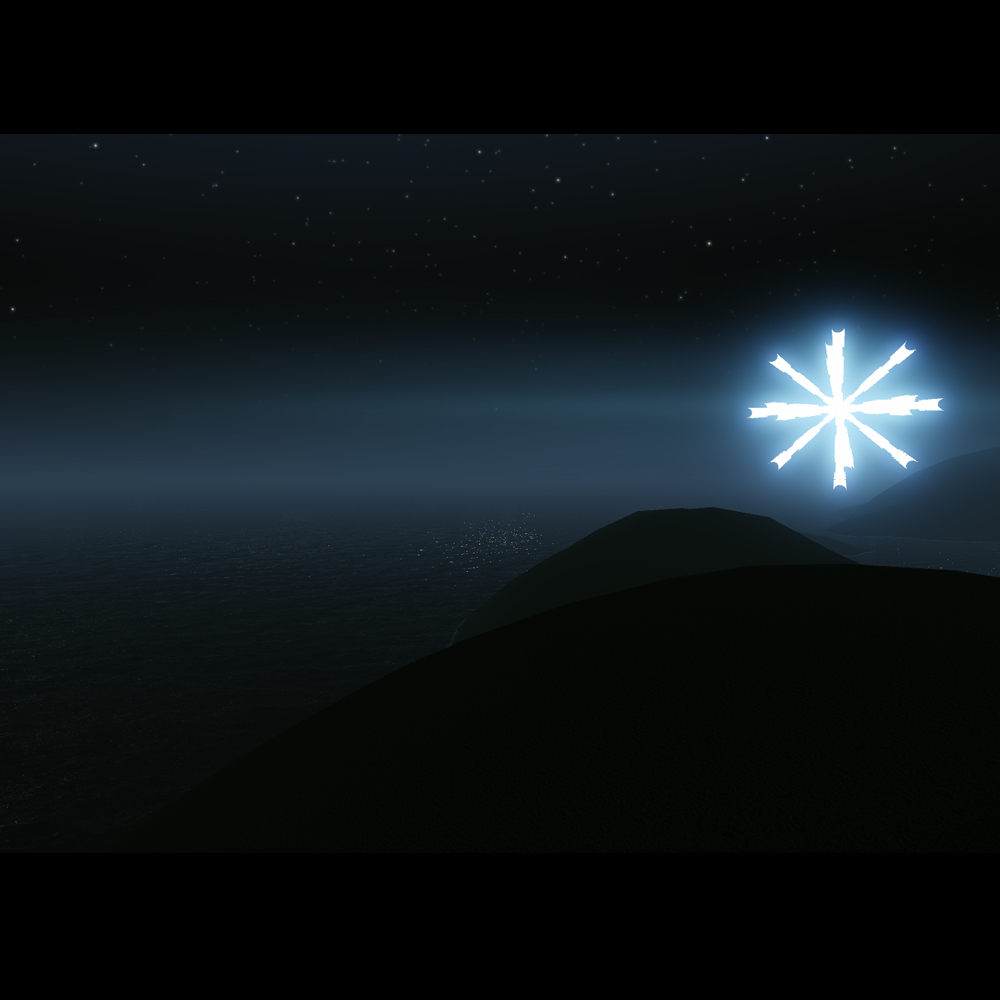
Combining the 'beams' in a different way to make a 'snowflake' shape rather than a 'tower'
Introduction to CryEngine

Made up a simpler model in Sketchup to learn how to export and import into CryEngine

Imported into CryEngine

Investigating scaling and views

Imported actual model after much changing of settings. Still no texture at this stage

Adjusting textures with the material editor, and altering the landscape

Managed to insert landscape scenery. Looking into which angles might be interesting

Human figure for reference on scale

Adding new textures after following online tutorials. These rock textures were high quality jpegs taken from Google Images then applied in Sketchup and exported to CryEngine

A comparison between original export settings and settings followed after watching tutorial

Looking at different ways of manipulating model

A wide angle of the different experiments I have constructed so far, with a new 'rust' texture applied in the foreground
Sketchup Model Developments
A few screenshots to show minor changes made to the Sketchup model

The original 'beam' structure

Adding on to see effect

Experimenting with different ideas

Changed end for more interesting look

Staying with idea of 'composition'

New structure

Stacking 'beams' differently to give more overhang

Looked good on paper but extra overhang just looks messy, so abandoned this idea

Re-stacking with no overhang

No overhang means 'tower' has cleaner look and is easier to make sense of.
Minor changes don't look very different from distance but give a more interesting close up- will be good when adding texture etc. later
Monday, 10 September 2012


Subscribe to:
Posts (Atom)